Creating and adding a custom header
Custom headers allow specific sub-sites or sections to maintain a distinct identity while remaining linked to a parent site. They are particularly useful for sub-sections that require unique branding, specific navigation menus, or different contact details than the main site. By using the Microsite layout, you can differentiate a sub-site's visual identity while ensuring it adheres to standardised University templates.
Before adding a custom header

After adding a custom header
Step-by-step guide
Creating the custom header
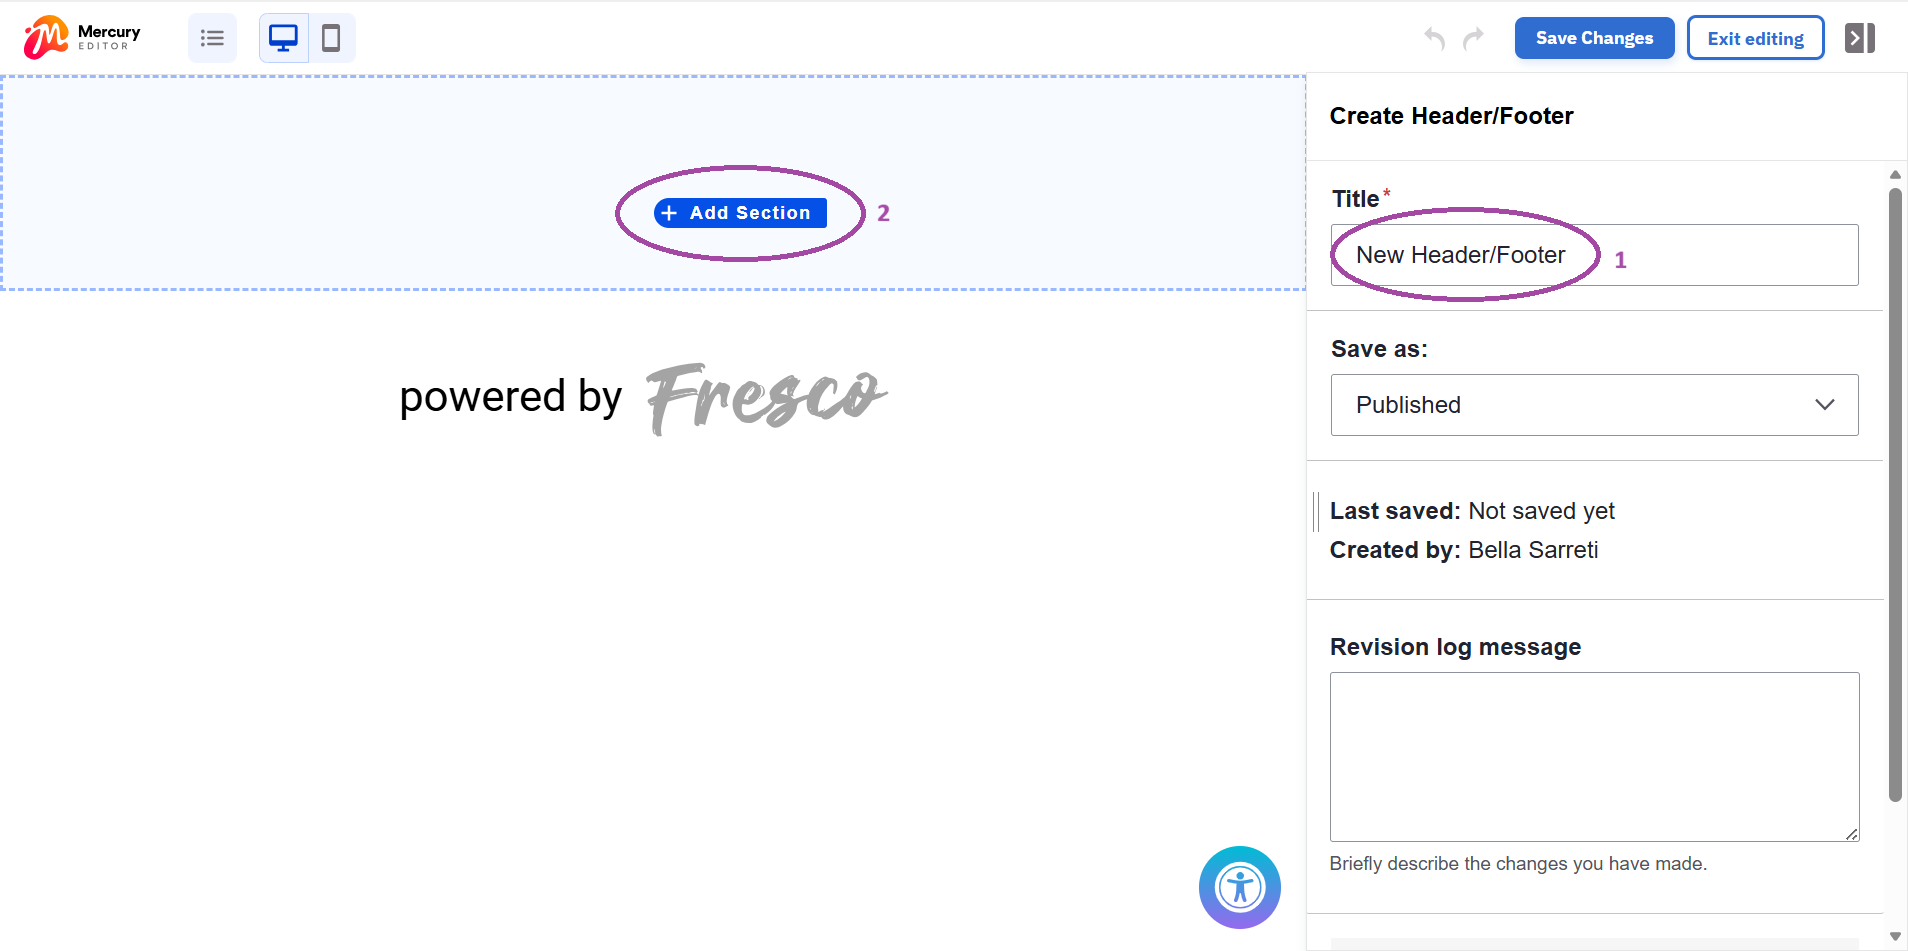
Step 1
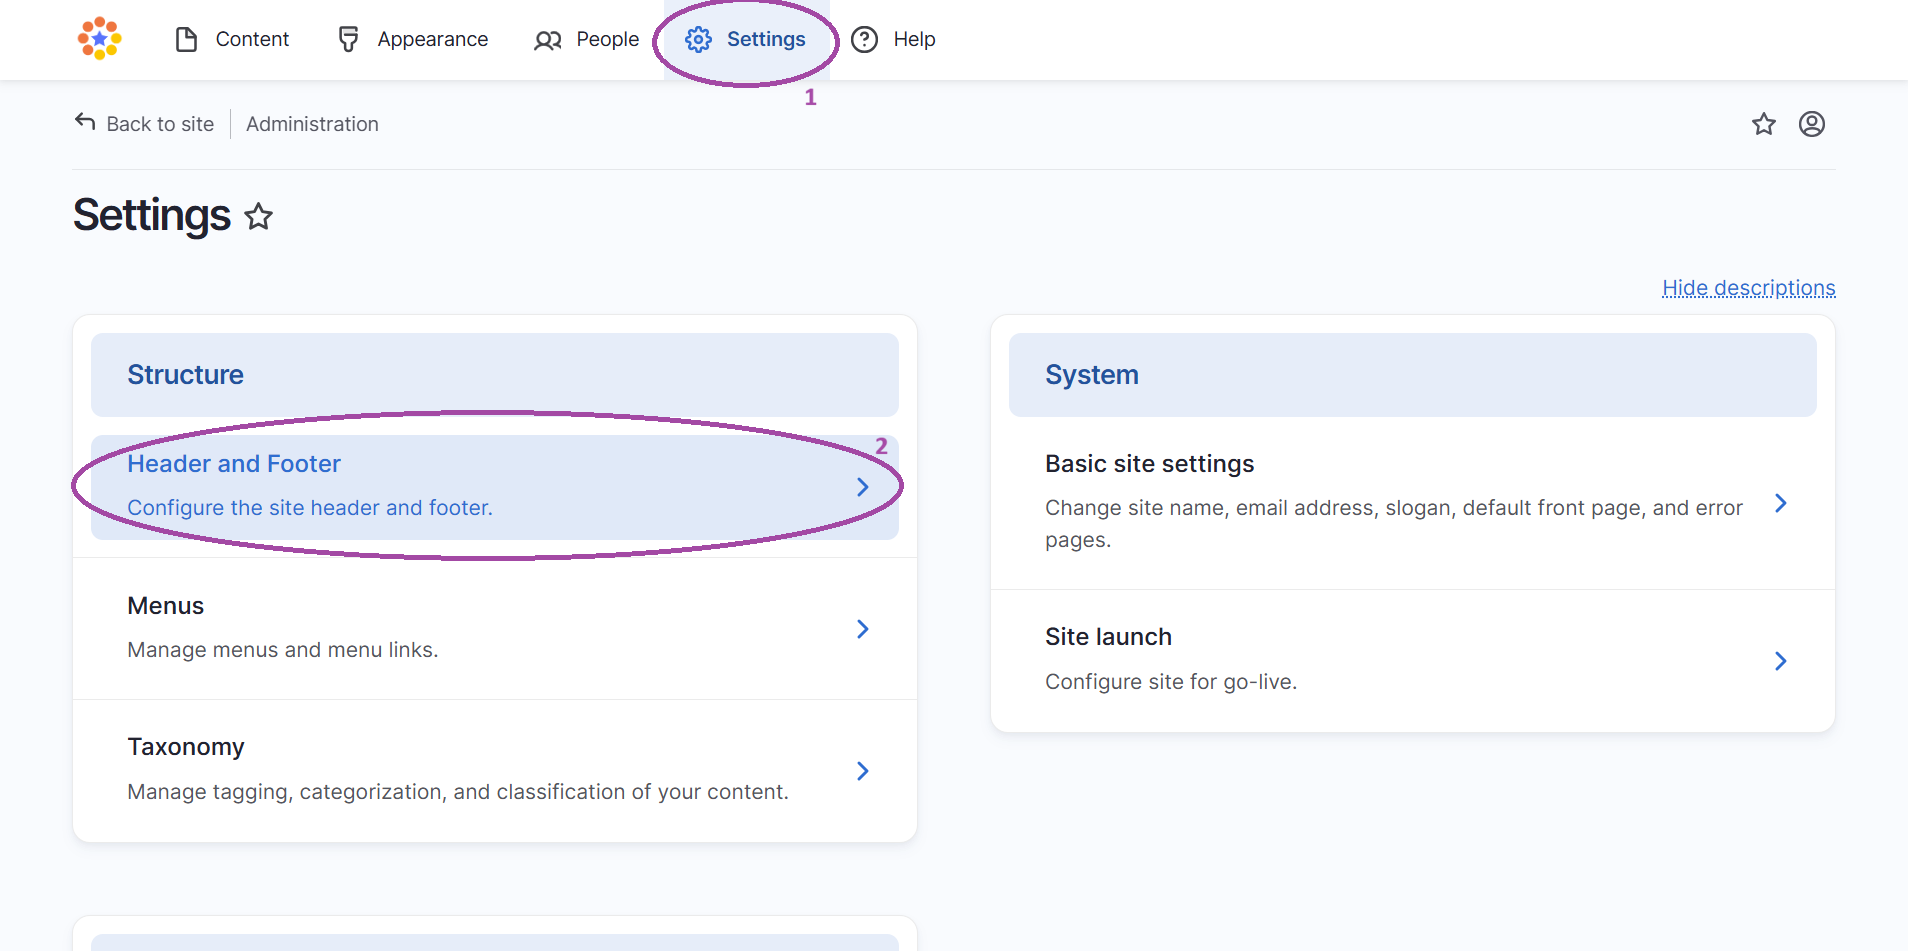
- Navigate to Settings > Header and Footer on the Admin Ribbon
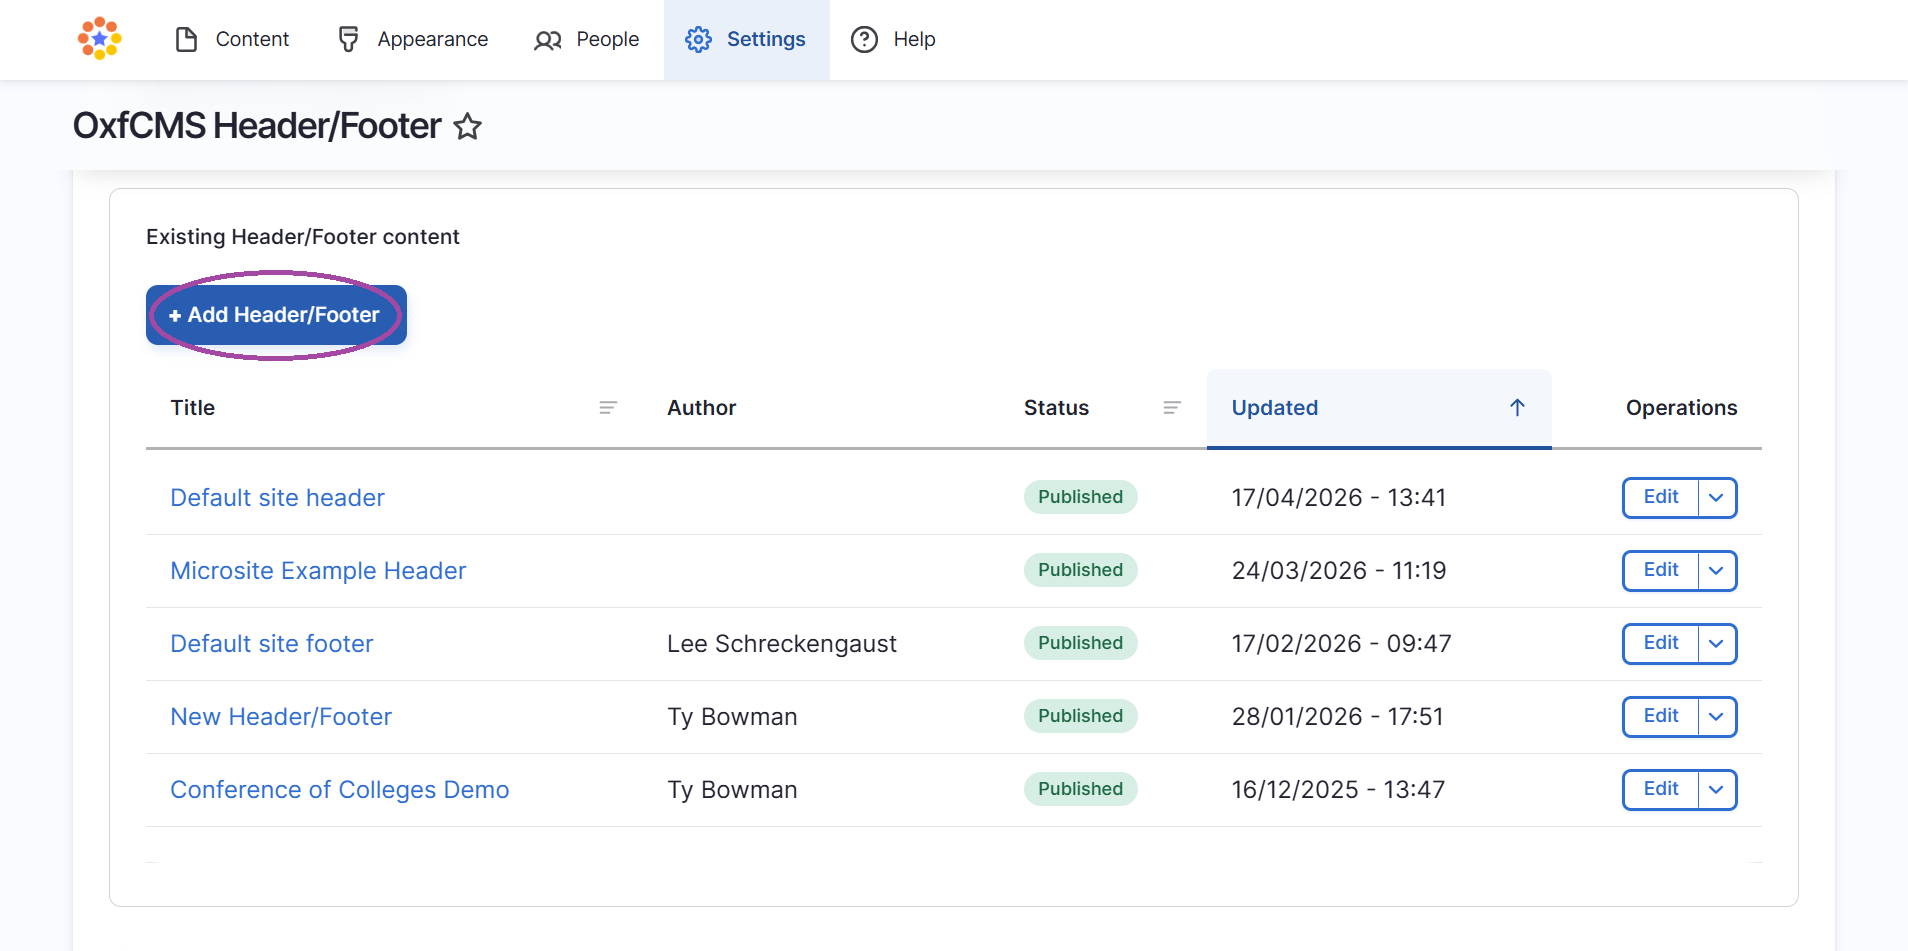
- Click Add Header/Footer
Step 2
- Enter a descriptive name in the Title field (this title is only visible to editors)
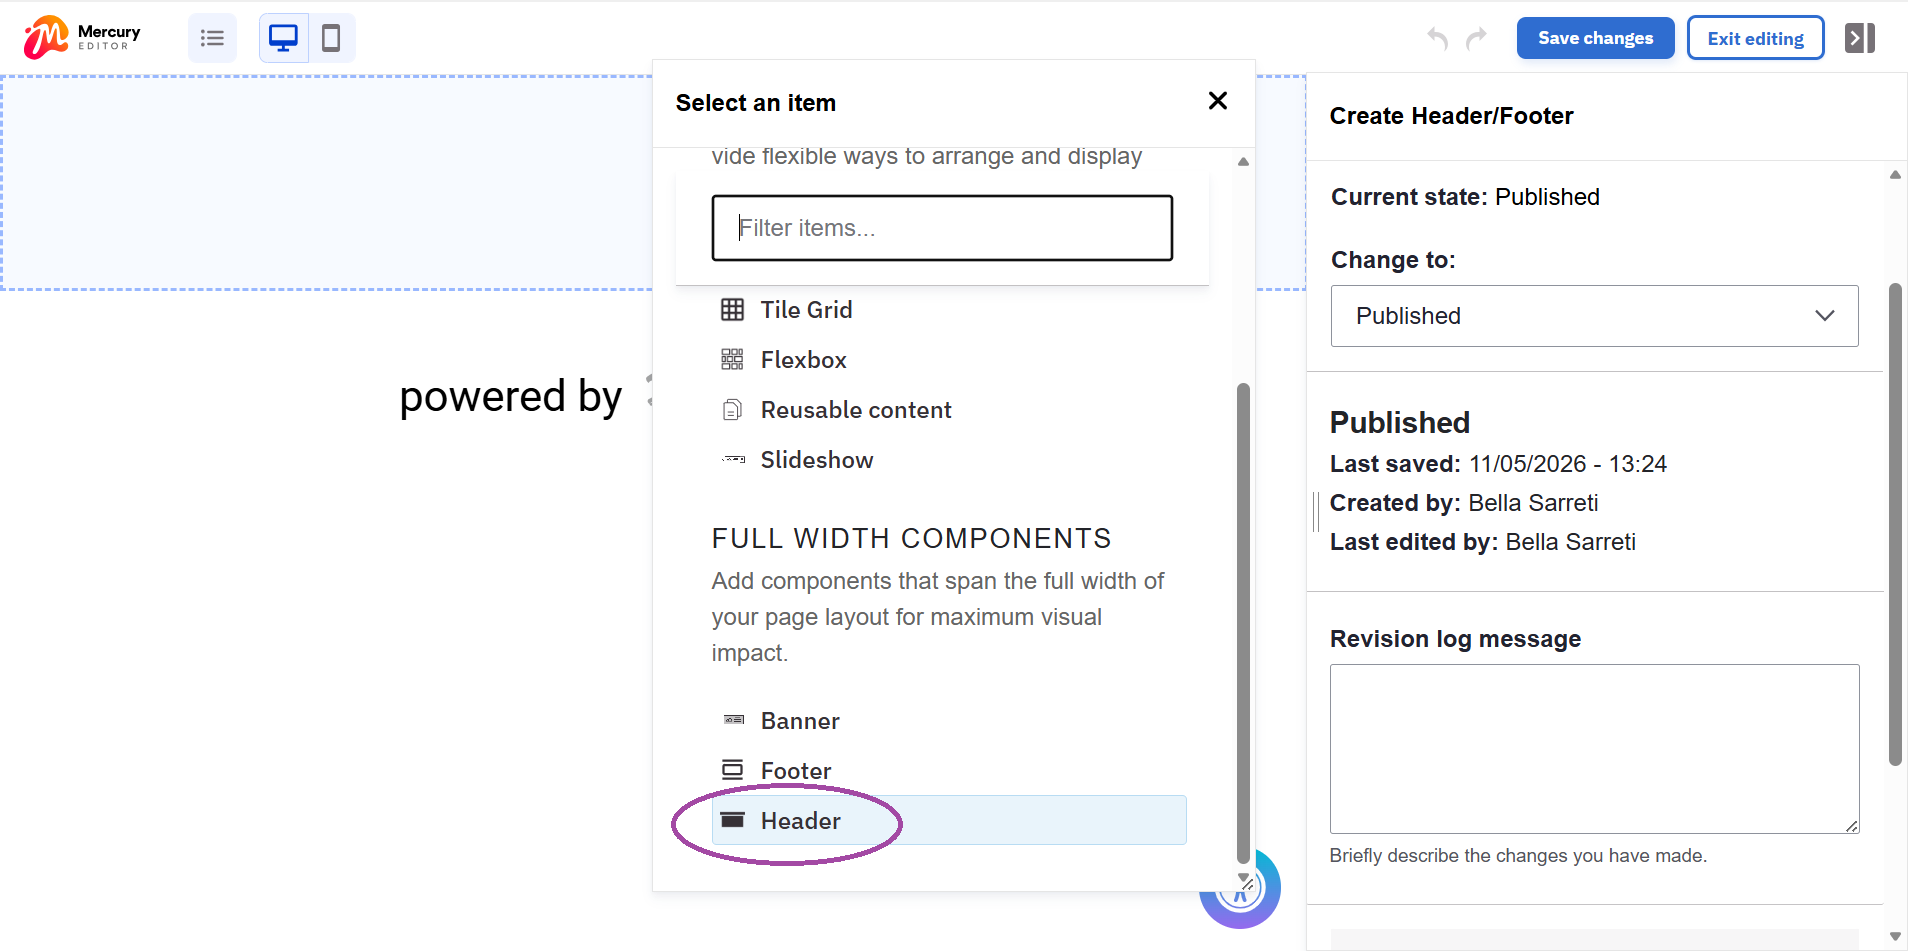
- In the Page Preview area, click the blue + icon and select the Header component
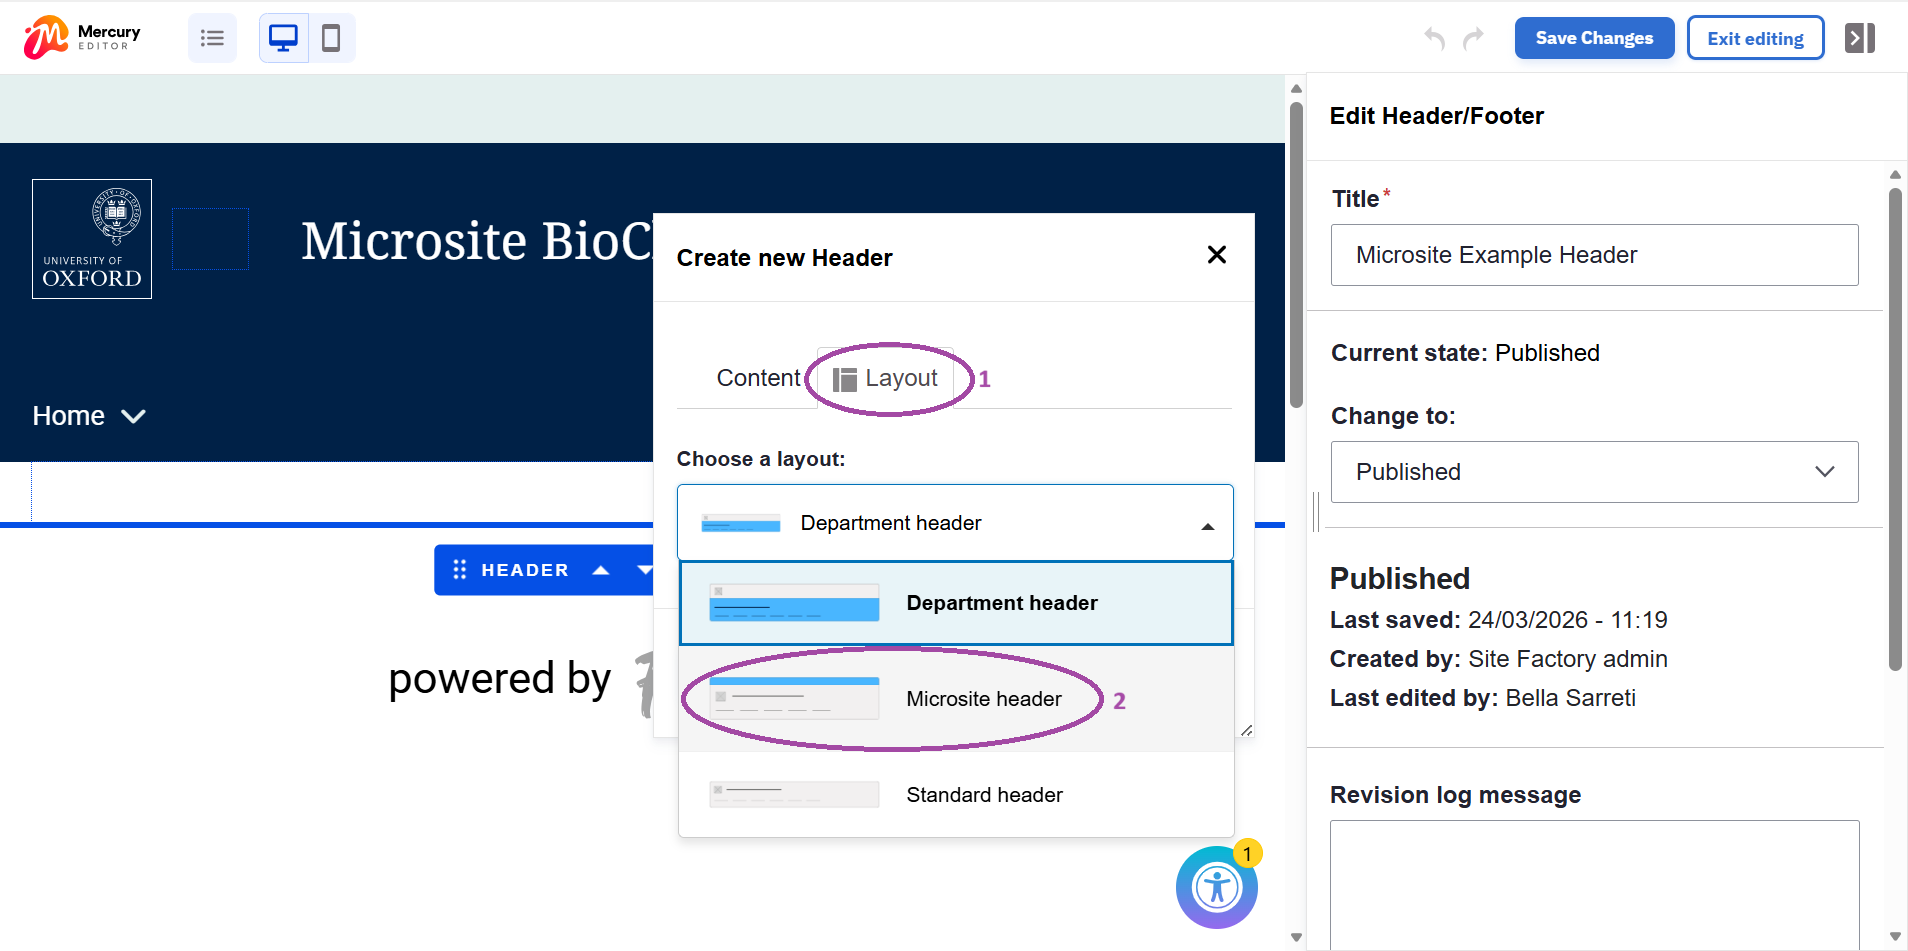
Step 4
- Choose the Microsite layout from the options and click Apply
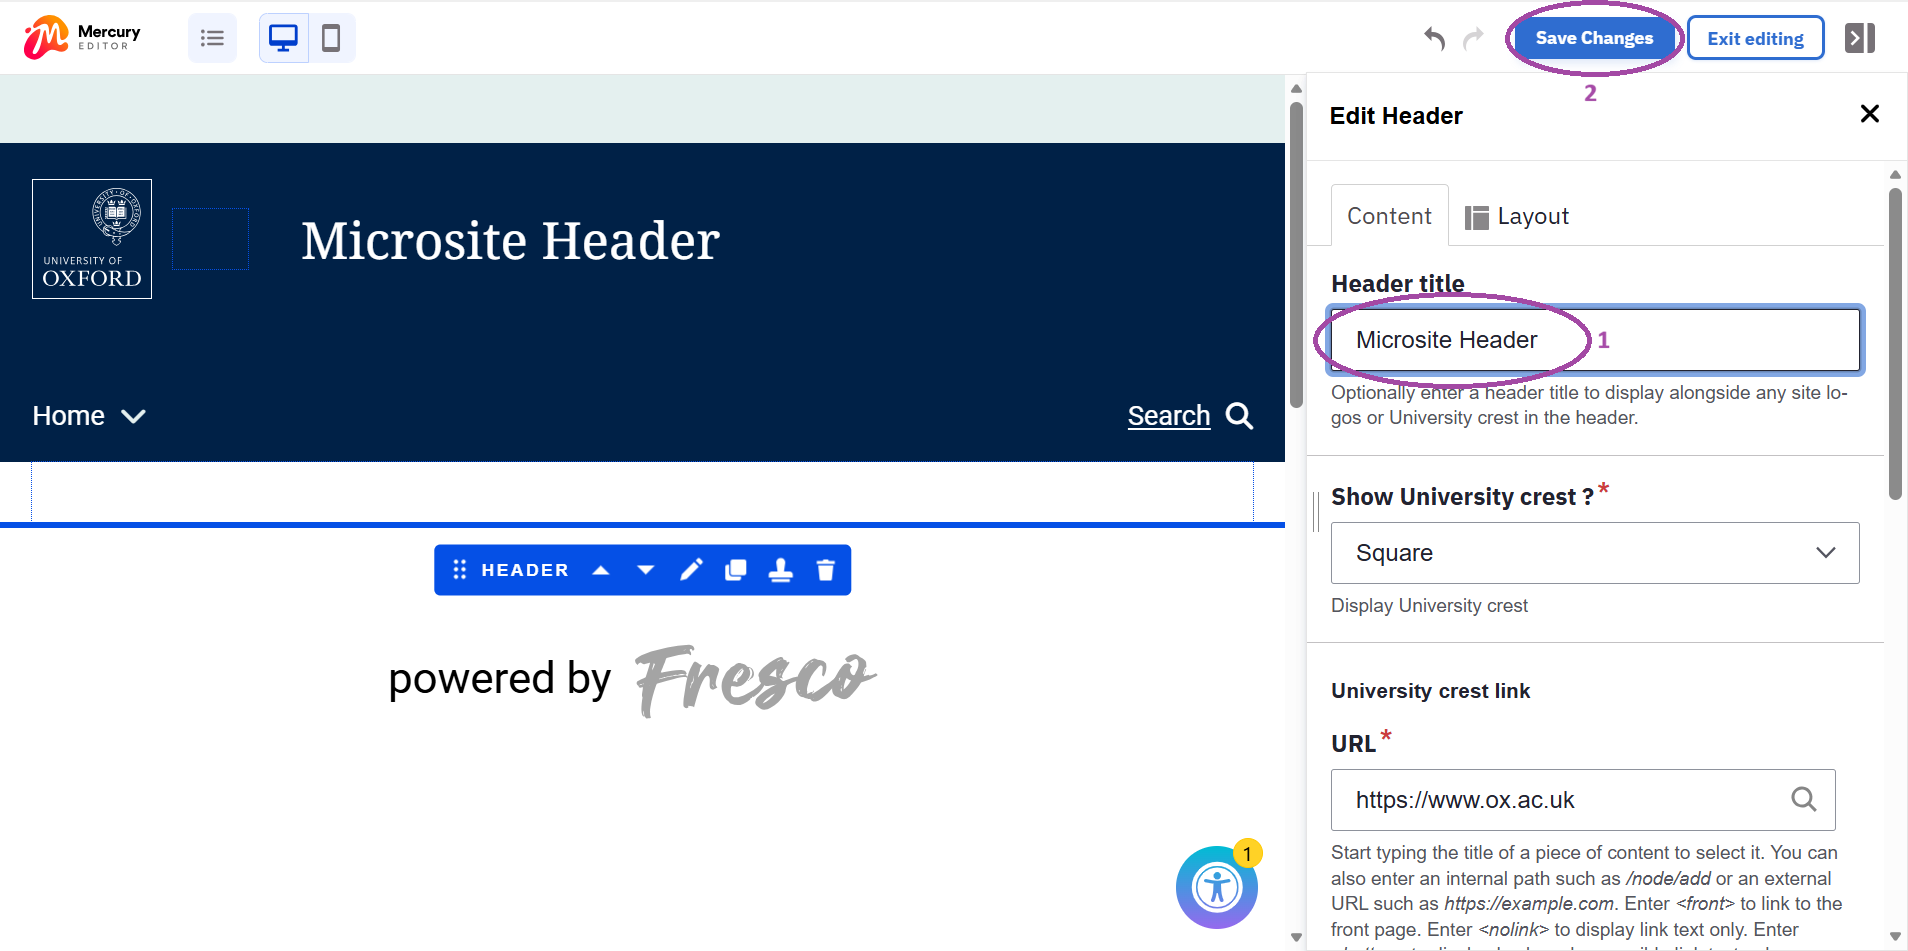
- Click on the header in the preview to open the Edit Pane and configure the following:
- Header title: Enter the name of your microsite
- University crest: Choose whether to display the crest and select its shape
- Menu: Assign the specific menu you want to appear in this header
- Click Save
Assigning the header to certain pages
Step 1
Once the custom header is published, you must manually override the site-wide default on the pages you have selected:
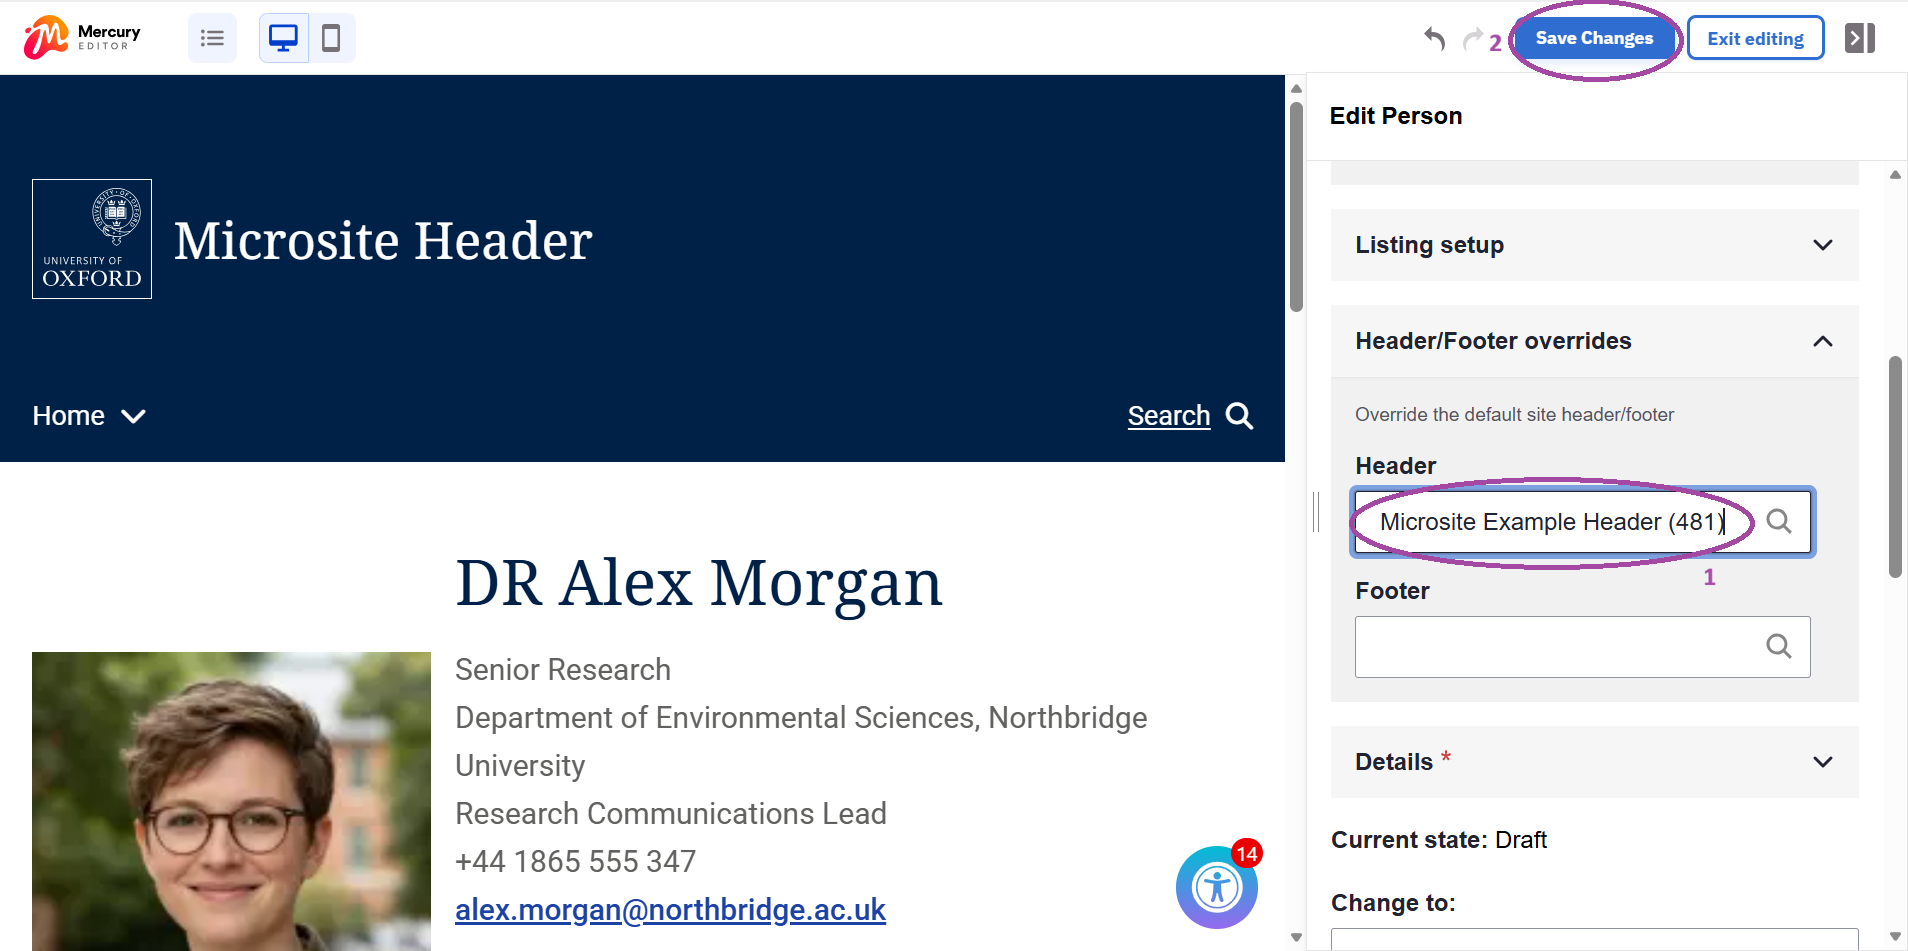
- Go to Content and open the specific page you wish to update
- In the Edit Pane on the right-hand side, locate the Header and footer overrides accordion
- In the Site header override field, start typing the name of the custom header you created in Step 1 and select it from the autocomplete list
Click Save
Repeat these steps for every page that requires the custom microsite header